Archive for October, 2010
Journey to a Friend Part 2
Posted in Interior Decorating, tagged House of Hy, interior decorating, Pioneer Woman on October 26, 2010| 2 Comments »
“If you did want to trade some design work for a PW shout-out, I will
A little encouragement goes a long way!
Posted in Interior Decorating on October 18, 2010| Leave a Comment »
I love it when my clients succeed! It is so fun to see the things they are able to accomplish in their home.
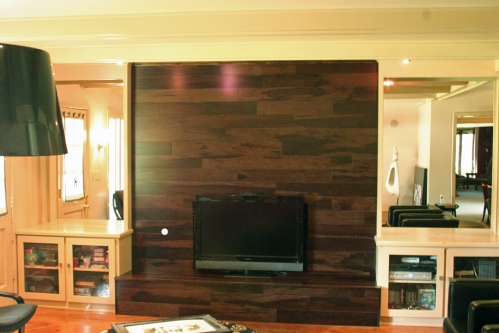
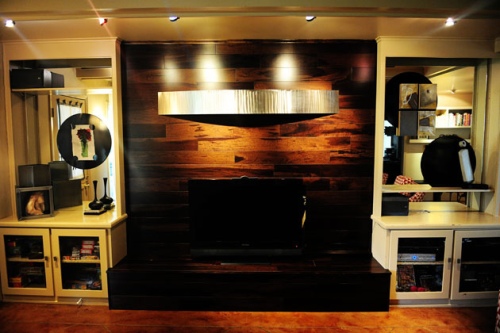
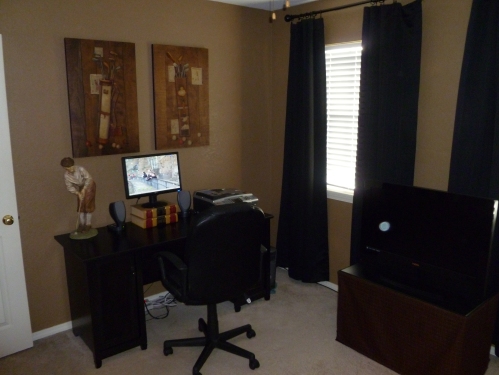
This past summer I offered a consult special. My good friend and client gave me a call. She wanted to take advantage of the discount to update her husbands office (a.k.a. Man Cave).
I always look forward to working in this friend’s home. We have so much fun working together. I just knew this time would be no different!
When I arrived, I found my good friend overwhelmed by a few life issues and she needed this project as a positive distraction. Because she trusted me, she needed me to get her off on the right foot in this project. Usually my client has a starting point or inspiration, but on this occasion, she simply knew it was time for a change.
We entered this room and took a seat on the floor to begin brainstorming.
Because this room is primarily used by her husband, we needed to make sure it reflected his likes. My friend shared with me that her husband was passionate about golf. She definitely wanted to incorporate his ‘love of the game’ into the space.
Initially, my thoughts went to painting the room green and finding beautiful photos of famous golf courses. The photos I have seen always have such vibrant colors and this seemed like a good direction to go, but I am so glad I continued to visit with my friend. (I had not shared my initial ideas yet). Now that I had a theme idea, I thought talking about room color would be a great next step.
You see, the last room I helped her with, we painted green. Although she absolutely loves her master bedroom, she really didn’t want to repeat that color. Good thing I kept talking. Guess my initial idea needed some tweeking!
After further discussion, she shared that she thought about using a dark brown in the space. This sounded great to me. Now it was my job to figure out how to incorporate the golf theme. Honestly, I was drawing a blank and thought about not charging her for my help because I didn’t seem to be providing much.
We continued to visit about life and then, all of the sudden, the ideas began to flow. This is when I thought of incorporating ‘vintage golf’ instead of current golf collectibles. Once we discovered this new plan, the project came alive and so did my friend’s enthusiasm! She quickly jotted down all of my suggestions regarding paint color, window treatments, furniture, accessories, etc.
Not long after my initial visit with my friend, a new baby came into my life and work as I knew it came to a sudden halt. My friend knew that I was pretty busy with the new baby and decided she would take the knowledge I gave her and put the room together on her own this time. And let me tell you, she is a great student! She did a fabulous job!*
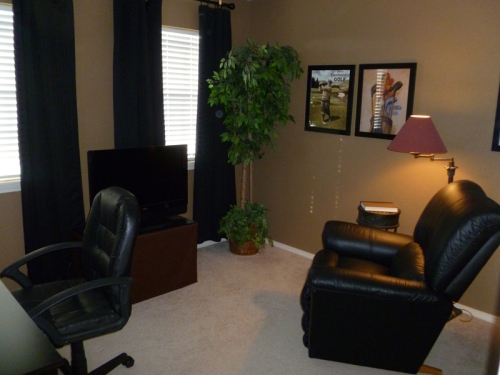 *This fact is further confirmed by her husband’s approval! 🙂
Anastasia turns 9!
Posted in Journey of our life, Kids on October 18, 2010| 2 Comments »
Beauty Through Beholder’s Eye
Posted in Interior Decorating, tagged interior decorating, mantles on October 11, 2010| Leave a Comment »
A few weeks ago, I mentioned that I wanted to begin a series showcasing the stories that different furniture and accessories hold. With my upcoming 8th anniversary, I have found myself reviewing the archives of my wonderful experiences working in client friend’s homes and was reminded of this memorable story.
Disclaimer: Please be mindful that we are going way back…year 1 and 2 of my business, and I have become a much better decorator during the years. I am seeing a few things I would do differently today! 🙂
Several years ago I had the opportunity to work in this home. The mantle was an extremely challenging project for numerous reasons. First of all, the mantle itself was extremely narrow. Secondly, the space above the mantle was enormous. And to make it really tricky, an angle was thrown in!
The homeowner had no pieces of artwork large enough on their own to fill the space so I had to be creative. 🙂 I began to look around the home for items that related to each other by either color or subject matter to fill the space.
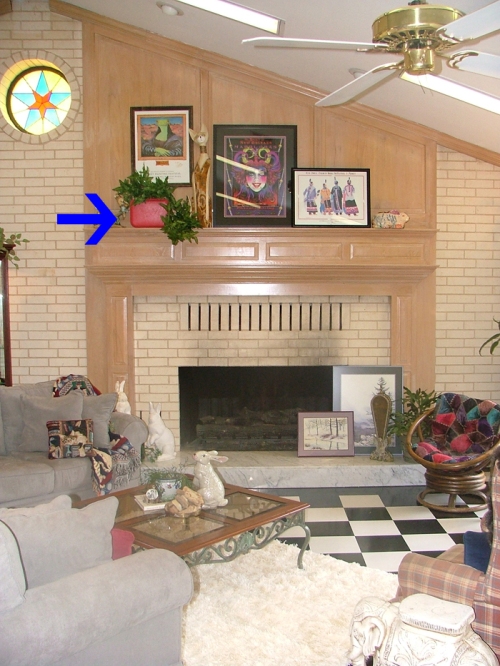 After a period of deep thought :), I came up with the decision to arrange several “whimsical” items. The homeowner had a fun personality and lived in a quirky house (the house alone, designed by a bachelor, has quite a story) so it seemed like a great solution. As you might notice, I hung the pieces of artwork over the mantle to follow the angled ceiling line. By doing this, I created a small space under the “Lizard Mona Lisa” that needed just the right piece. This was a tricky area to fill especially since the mantle was so narrow. I simply began to collect items I thought might fit the space and tried them out until I found just the right one.
Do you see the small red suitcase by the blue arrow above? Well, this was one of the said items I thought I would try. Honestly, when I put it up there I really wasn’t crazy about how it looked but before I could take it down the homeowner walked through the room. Immediately she shared her approval and couldn’t wait to share with her daughters. You see, this small suitcase belonged to her sweet daughter that died over 40 years earlier at the age of 8 or 9. It meant so much to her to have a special reminder of this child front in center in her living room. As you probably have figured out, the suitcase stayed. There was no way I would remove it once I heard the story. In fact, I don’t think there could have been a more perfect finish to the arrangement!
Simply Beautiful
Posted in Interior Decorating on October 4, 2010| 1 Comment »
A few weeks ago, I was able to participate in the most beautiful wedding. Now, I might be a little biased because family was getting married, but I can honestly say it was one of the most beautiful ceremonies I have ever attended. What made it so wonderful you might ask? Its simplicity!
The wedding took place in a storybook chapel in the middle of a ranch in northeast Texas. It is called Willowwood Ranch Chapel.
Isn’t it beautiful?! The location was so breathtaking on its own that the need for wedding decorations was minimal. This was especially nice for everyone involved. We were able to enjoy the occasion instead of being bombarded with responsibilities.
I was asked to play a small decorating role in this event. There were two planters on either side of the entrance of the reception hall that needed a little ‘sprucing up’! I was given challenge…create a welcoming entrance – CHEAP! 🙂
Luckily, this is my strongest ability, due mostly to my own frugal decorating budget. I actually thrive (decoratingly speaking) on this type of challenge and gladly took it on!
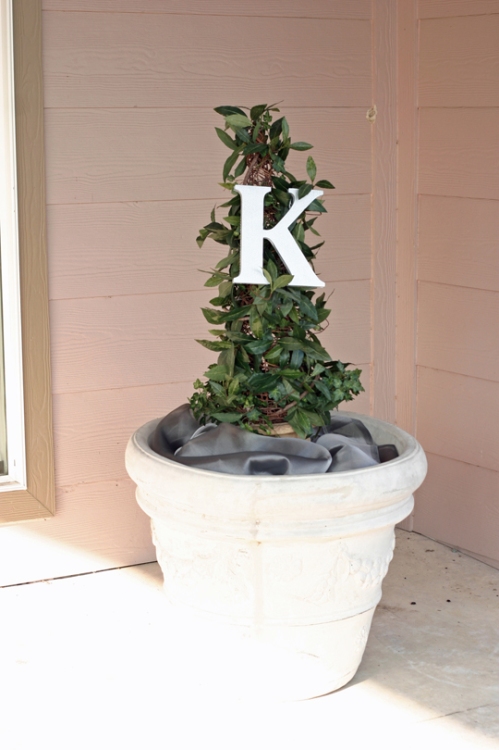
The first order of business, figure out what could be used to add height to the planter. Since I had a tight budget in mind, I quickly remembered two topiaries which sit on either side of my television. They would sit perfectly on top of the dirt filled planter and were just the height we needed.
Next I remembered how my soon-to-be sister-in-law wanted to incorporate his/her initials into the decor of the wedding. This is when I thought of my friend Larry of Beacon Stamp and Seal. If you can envision it, he can probably reproduce it. I knew I wanted 9 inch letters in a particular font. All I had to do is call, and Larry quickly found the font I desired and sent the order to be cut for me on the spot. It took longer for me to drive to Tulsa than it did for him to cut out the letters. Because I initially thought I would be covering the letters in moss, he suggested that the letters be cut from foam. If I were to do it again, I would probably ask for chipboard (lightweight wood) instead. (This is only because I ended up painting the letters instead of covering them with fabric or moss. Painting styrofoam** is slightly more difficult than painting wood.)
After I picked up the letters and made it to my in-laws, it was time to get busy painting!
I began by priming the letters.
Next I painted a couple coats of silver paint and then topped it off with a coat of silver glitter.
Here is how my little project turned out. What do you think?
Simple and elegant, just like the wedding!
There was a little area around the base of the topiary that needed attention. Just a couple yards of sheer silver fabric from Wal-mart’s clearance section did the trick!
And the extra letters I painted…
They beautifully filled the gap on the mantle in the reception hall. (Quick tip: a little packing tape goes a long way to temporarily hang styrofoam from rock.)
**Painting stryofoam is more difficult simply because the paint must be brushed on instead of sprayed on. This is due to the fact that spray paint contains elements that tend to ‘melt’ the foam and distort it.
Website

Archives
- January 2015 (1)
- December 2012 (2)
- October 2012 (1)
- August 2012 (1)
- March 2012 (1)
- October 2011 (2)
- July 2011 (1)
- April 2011 (1)
- March 2011 (1)
- January 2011 (2)
- December 2010 (4)
- November 2010 (6)
- October 2010 (5)
- September 2010 (2)
- August 2010 (6)
- July 2010 (2)
- May 2010 (1)
- January 2010 (5)
- December 2009 (5)
- November 2009 (8)
- October 2009 (10)
- September 2009 (3)
- August 2009 (6)
Search
-
What I’ve been up to lately…
-
Join 10 other subscribers
Categories
Blogroll
Favorite Blogs
